The Galiano Food Program hosted a community kitchen and presentation on “Year ‘Round Harvesting” by author, researcher, and “seasoned” green-thumb Linda Gilkeson.
Linda, who grows 99% of her yearly vegetables (and the majority of fruit as well!), was sharing all sorts of ‘secrets’ in hopes of spreading the word that we can nurture our own fresh veggies all year ’round.
There was a solid turnout of over forty-odd folks (and some were ‘odd’ to be sure), there to learn some tips and tricks on growing winter food in the Pacific Northwest.
Early spring, it turns out, is remarkably productive in our area. March/April is traditionally a ‘hungry gap’ where supplies from the previous year’s harvest are running out. In this area, however, your garden can be remarkably productive in those months.
On the myth busting side of things, she emphasized that if something freezes it’s not dead… just don’t pick it while it’s frozen! On the contrary, some plants do much better after they’ve been frosted once or twice. If it’s frozen, you could put it straight into a soup pot, but if you pick it while it’s frozen it will start to decay right away, so don’t expect to pick frozen stuff for storage.
You Don’t Need A Greenhouse!
“No matter how bad the winter, most things will make it, with VERY low tech.”, she encouraged. You don’t need a greenhouse or even a cold-frame. A sheet of plastic will do.
That said, you must mulch a winter garden. There are good reasons for doing it in the summer, but for winter its mandatory. It keeps the soil temperatures even. What kills plants in winter is its inability to move water up into the plant. Mulch helps heat from the ground make it up to the plant roots and also prevents frost heaving.
Where to Grow?
Keep your eye out for patches of ground that are sunny through the winter, but not during the summer. Sun will go straight back to a wall under decks and porches, but in summer those spots would be in shade most of the time. There’s also a lot of opportunity for planting in deck planters.
For winter beds, you’re looking for good drainage. You might need to build beds up a bit.
Due to the low sun angle, cold frames, if you have time to build them, should allow light through the side. But a single sheet of plastic is all you really need, and sometimes you can get away without that.
Grow the Right Varieties
One central message that Linda shared was this: be sure that you get the right varieties. Cold weather can cause plants to prematurely flower, or ‘vernalize’. Winter varieties of broccoli and cauliflower won’t do that. They’ll put out leaves in the spring, waiting to the appropriate time to produce.
‘Fall crop’, as a variety descriptor doesn’t cut it for leeks. The aptly marketed ‘winter density’ and ‘continuity’ varieties of lettuce will make it, while a summer variety just won’t.
She came armed with many photographs of her spring crop, some of which proved the quality of the modern selection of kale. There are an astounding number of kale varieties, many of which are more tender and mild than those you might be more familiar with.
Corn salad is an ‘indestructibly hearty’ substitute for lettuce. It has a subtle baby corn flavour, but is not strong or mustardy at all. And four feet of snow doesn’t bother it in the least!
Looking for a celery substitute? Try celeriac, which tastes like the hearts of celery. When you cook it, it turns very creamy without much in the way of fibrous material.
And you can do lemons in this area, but they’ll need to come under glass during the winter, but not necessarily in any heated structure.
Timing is Everything
As a summer mantra consider, “Never leave a bare spot in the garden for more than 24 hours.” You can put a seedling bed in place, just after harvesting some other crop. The seedlings start out as way too crowded, but you can thin them or transplant them later. You may need to pull some tricks to protect your seedlings through very hot Augusts. You can also ‘interplant’ between things that will be very tall. Mature lettuce can act as a mulch, shading the seedlings below it.
It’s hard to remember to plant in the summer. For Linda, the 1st of July is Carrot Day. She points out that the ground is a “living refrigerator”.
If you leave your food in the garden, you can still be eating fresh in May.
Come November, she’s especially interested in protecting root crop shoulders. “Cosy up the lettuce. Snuggle up the spinach.” Now, there’s a battle cry for the ages, if I’ve ever heard one!
“‘Winter Eating’ is what we should be calling this.”, she said, as most of the planting is the late summer. Weeds slow down during winter. There are no water restrictions. You do need a nice day once in a while throughout the winter to go out and grab some stuff for the fridge, but by and large the heavy lifting will already have been done.
The evening was capped off with a lively question and answer period. Here are some Fast Facts from that session:
- Soil Management: Add lime (and/or bone meal, ash) to your soil to counteract the low pH (acid soil) caused by our heavy rainfall levels. She feeds very heavily once per year in any given bed. The bed gets a solid feed, particularly after a garlic crop.
- On Mulching: When you put burlap and newspaper down, do you get bugs underneath? Not if the soil has been dry long enough. Rather than lay it flat, you can put wire mesh down first, and lay cover over that to allow some air underneath.
- Anti-slug Tricks: Consider Safer Slug bait granules, but only use a small amount. Iron in the bait interferes with their ability to make slime. It’s NOT certified organic. For that, ground beetles are great predators of slugs. Generally speaking, fast creatures are good because they prey on slow ones.
For further information, check out Linda’s website, and check into her books for sale here.
 We have an upcoming Community Kitchen on January 16th at 5:30pm
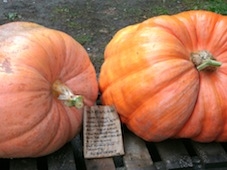
 Friday, October 21st, at 1:30pm at the South Hall, we’ll meet to prepare, cook and divide up the two Giant pumpkins donated by Roger and Lisa at Sunshine Farms.
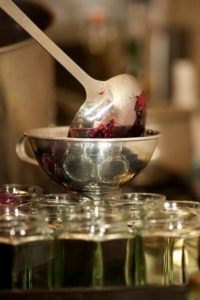
 When the opportunity to go to a Canning workshop with one of Bernadin’s top chefs arose, I jumped at the chance. I know a lot about canning, my Grandma taught me to make Jam almost 30 years ago, but there’s always something new to learn. As it turned out – I learned a lot. The biggest realization was that I’m a bit of a jam snob! I make jam the old fashioned way. Long boil, with thermometers, copper pots, and an understanding of the various pectin levels of different fruits at different times of the year. I consider myself an expert at the obscure wrinkle test. And for the last few years I’ve taught “old-school” jam classes through the Galino community Food Program, making hundreds of jars of jam with participants. My Grandmother taught me never to waste food, and I have tried to pass some of those food preserving skills on.